A few months ago, beer sales gun Darren Kearns (Kearnsy) started working for us at Black Hops. If you aren’t familiar with the legend that is Kearnsy, please watch this video at once.
Anyway once Kearnsy started, we made some serious changes to how we do sales at Black Hops (I’ll be writing about those changes soon). One of the biggest changes was changing our focus from purely on making sales to venues, through to ‘activating’ sales at venues. In short, we started creating marketing items for venues to use to help sell more Black Hops. Everything from signs that offered a free schooner at the brewery at local bottle shops with every 4 pack purchased, to coreflute signs, A3 posters, surfboards you name it.
The biggest activation was our bottle shop displays. This one was a tough one. I can normally figure out basic graphic design problems, we have a couple of great designers we use and I know enough myself to do the really simple ones. But building a display for bottle shops was entirely new and I wasn’t sure where to start.
So I did what I always do and I posted it on Facebook looking for advice (hashtag lazyweb).
I wasn’t super happy with any of the responses and one afternoon Kearnsy (the man with endless ideas), came into my office and mentioned the idea of doing some sort of Ammo box. We talked about what we could do with it, and then the next day instead of spending all day on my computer, I went to bunnings and spent all day building shit.
Here’s a bit of a step by step of how we got them done, who helped and the results.
The Design
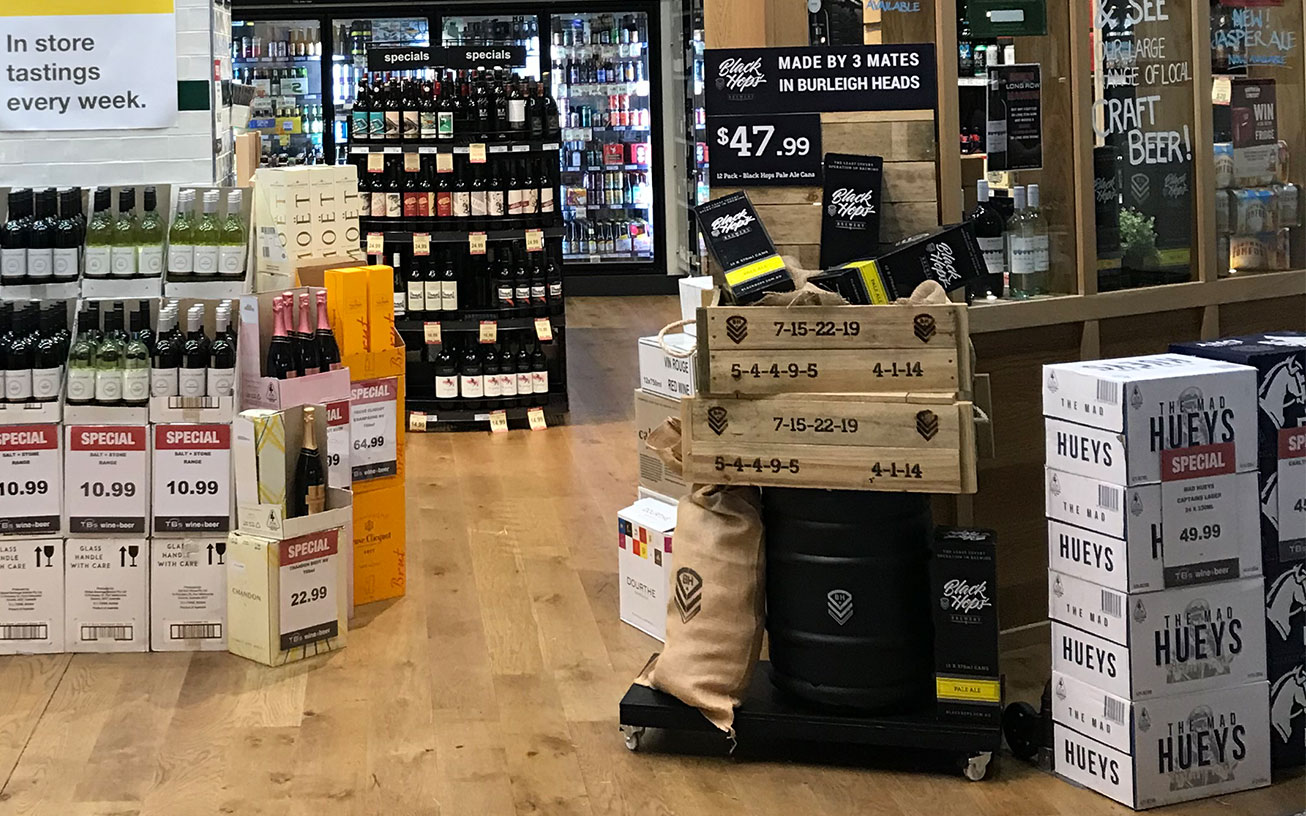
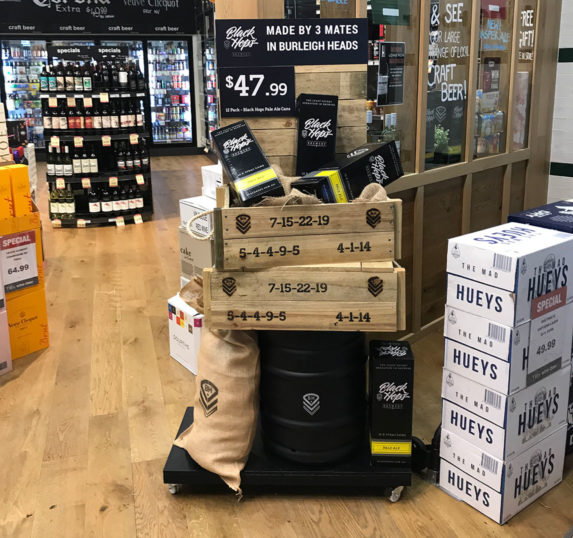
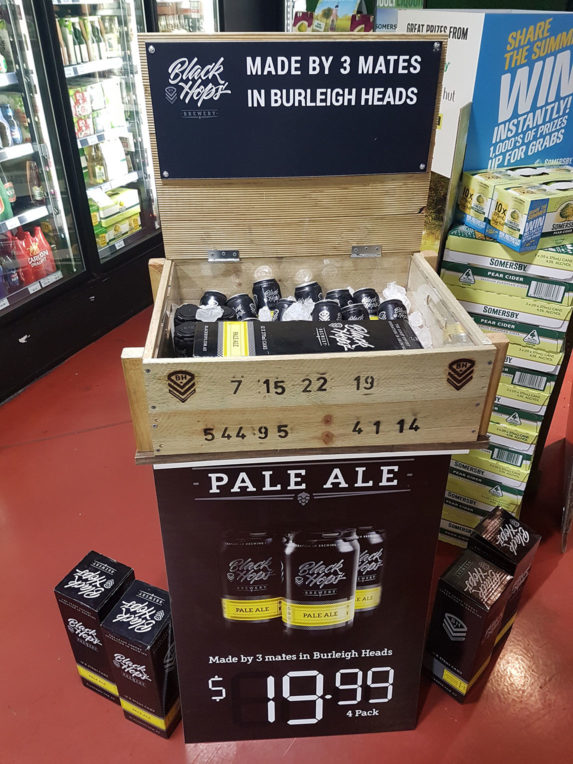
Here’s a photo of one of the finished displays and a breakdown of the design. This photo is from Pacific Fair Wine and Beer.
So from top to bottom, these are the elements:
- Signage – The sign that sits behind the box (the 3 mates from Burleigh one) is made from Armaboard (like more dense Coreflute), and was printed for us by Thirsty Merchants. The price sign is the same, we got a bunch done with different price points. We’ve had a few customers who are running different price points. For those we just print it at Officeworks for 62c then guillotine and laminate it ourselves in the office.
- Ammo boxes – I made the first one myself by Googling a few and ripping up a few pallets, then we had Australian Industry Trade College (AITC) make up some more for us. Matt from AITC is a mate of ours and a regular at the Black Hops Taproom. I’ll go into detail on the boxes below.
- Sandbag – The bag is a Hessian gardening bag from Bunnings. I had Graffiti Stickers in Burleigh make up a stencil from our logo and sprayed it on with cheap black paint from Bunnings.
- Black Keg – The keg is a normal keg, we had a few left over from before we were using Kegstar. I painted it with some old paint we had from when we painted the brewery. BTW the Black Hops ‘Black’ isn’t actually Black, it’s kind of blue black. I put a monogram sticker on the front which we purchased from this supplier on Alibaba.
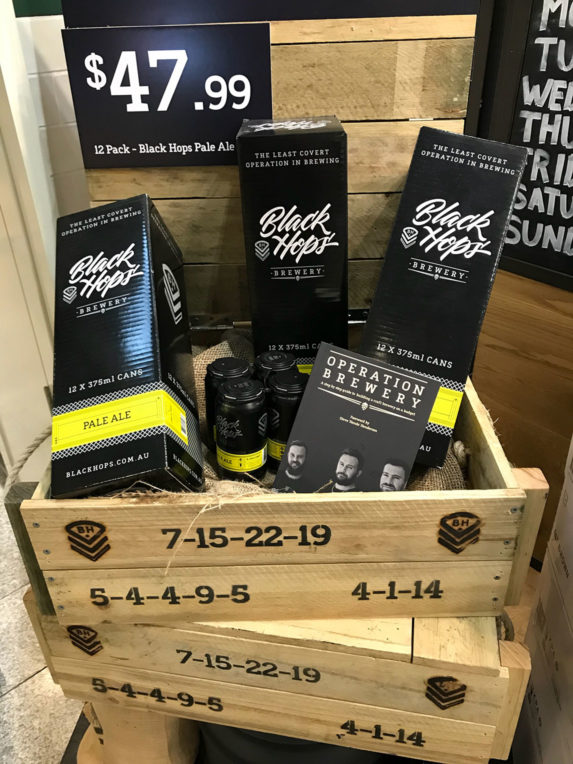
- Display cartons – The cartons are our normal cartons stuffed with cardboard to give them a little bit of extra weight.
- This particular display I also made up a base with wheels and tied the display to the keg and the keg to the base with cable ties, so it could be wheeled around. The other displays aren’t on wheels, but Pac Fair bring their displays in every night so wheels were a must.
We also filled some cans with water on canning day and have some display 4 packs in some of the boxes as well and we’ve started adding the book just for another point of difference.
How to make the Ammo Boxes
The ammo boxes are pretty easy to make. I made the first one out of a few pallets and some draws I had lying around at my house. Once I made one, I made some plans up and bought bulk materials from Bunnings and the legends at AITC made up a bunch more.
Here’s a bit of a step by step summary of the plans I did for them.
Lower box
The display is made up of 2 boxes which look identical once in place but they actually aren’t. The lower box doesn’t need a lid it just needs a paling around the top on the sides and the front to make it look like a complete box when the top box sits on it.
The box is made with treated pine fence palings, or pallets, or thicker treated pine (the more recent ones). It’s screwed together with square blocks on either end to make it look more chunky.
The one above was made using a draw I had lying around at home, but the ones made by AITC just used palings and used a masonite base (which draws have anyway).
We add handles to the side again mainly just for show. We used a big roll of hessian style rope from Bunnings.
I did all of this with a circular saw and spare pallets, the rougher the better.
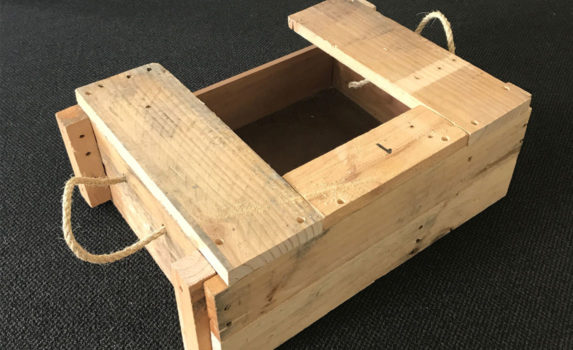
Top box
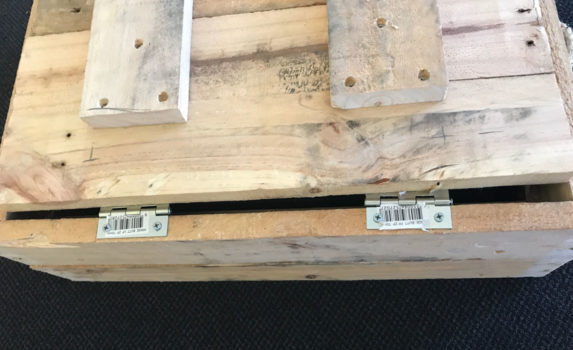
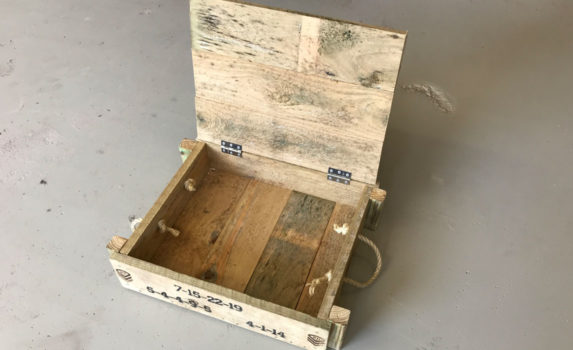
The top box is the same as the lower one with a lid which lifts up to just past vertical using cheap hinges from Bunnings. I also put a bolt on the back so it doesn’t fall forward when on display.
Here’s the latest one I’ve done using the thicker treated pine material from Bunnings which looks a bit cleaner and chunkier than the fence paling boxes.
There’s a few other things I added to the box for a bit of fun and to make it look a bit more like an Ammo box.
- The Black Hops monogram is added using a soldering iron style branding iron. We had this made up by the guys from CNC Creations via Thirsty Merchants. It cost about $500 which wasn’t cheap but we can use it forever. Took a bit of getting used to but it works well.
- We also added numbers to the front and the side. And yes they mean something, if you want to have a crack at figuring out what they mean here they are: 1-12-9 , 18-1-9-12-15, 7-15-22-19, 5-4-4-9-5, 4-1-14. Let me know in the comments if you get it, it’s pretty easy, but don’t say it or you’ll ruin the surprise for others, hashtag spoiler alert. I’ll give you one more hint. I’ve just ordered 2 more numbers: 3-21-18-18-1-14 & 11-5-1-18-14-19-25.
Variations
I’ve also made up a few variations of the standard box. We’ve made 2 that have acrylic inserts that we use as esky’s for tasting displays.
The first one was just a normal box with a big acrylic insert that I had made up by Gold Coast based EXP Plastics.
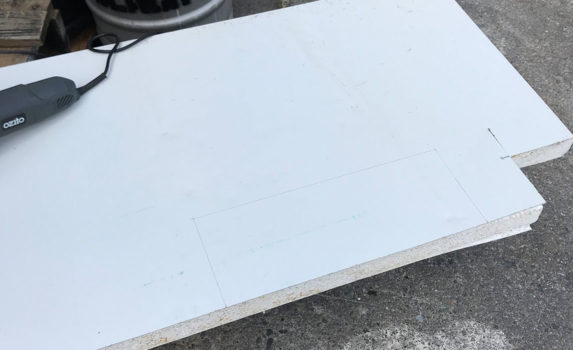
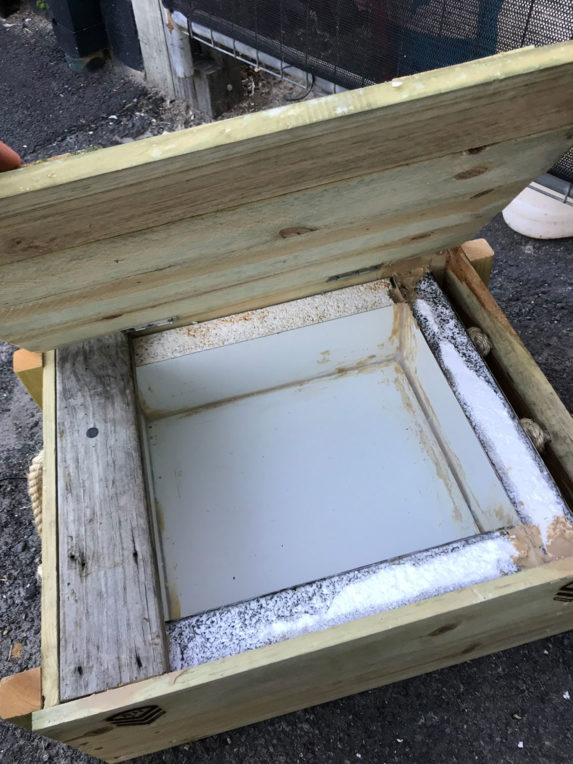
This one however is a bit unnecessarily big and I also wanted to make a proper insulated one, so I’ve recently made a smaller one that is lined with old cold room panelling I found in a heap of rubbish.
Here’s the sheet of cold room panelling, I just chopped it up with an angle grinder (the stainless outer) and a kitchen knife (the foam core).
I then glued it all into the inside of one of the ammo boxes and Sikaflex’d it all to keep it pretty water tight. I’ve ordered a black acrylic box to go on the inside of this and I’ll put palings around the top so you won’t see any of the insulation when it’s on display.
So we’ll have a big option and a small insulated option. The inner acrylic boxes cost about $100 to get made up and make them perfectly water proof.
Wrapping up
The displays cost well under $50 and in combination with other in store activations have helped pull through at the venues and have also been well received by customers.
[pac_fair]
If you have any questions about the displays feel free to join our Ambassador group on Facebook to dig into the details more.