If you’ve been following along our journey you’ll know we were building our craft beer brewery, on a tight budget, going directly to a Chinese manufacturer called Tiantai. If you wanted to catch up, here are a few options:
- OPERATION BREWERY EP2 – We have ordered our brewery equipment! This is how it went down
- Our visit to Tiantai (Jinan, China) to inspect our brewing equipment
In this post we will run through the process of getting it from China and installed in our brewery in Burleigh Heads. At the end of the post we provide a folder of images from the process, if you wanted more detail.
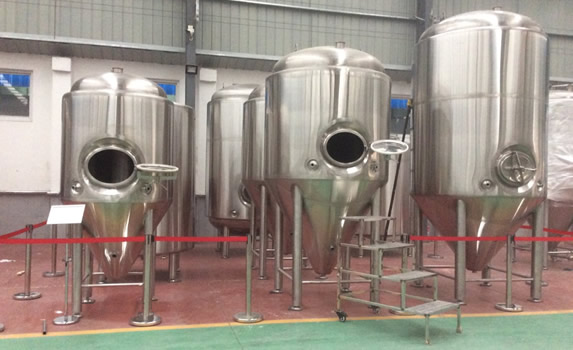
When we visited China in October, our setup was about 80% built, so we were able to get a good idea of the quality and get to know the Tiantai guys (yes they were real thank fuck). We were also able to see a number of completed orders prior to them being sent out. The trip was well worthwhile and very comforting, but still, we were all eagerly/nervously awaiting the delivery of our finished brewery.
We are stoked to say we now have our equipment, plumbed up, wired up, in place and ready to go.
Here’s everything that happened in between and what to expect if you go down this path.
Pre-purchase
The communication leading up to the delivery was very good with Tiantai. Up until our trip, email and text responses were very forthcoming, however pictures were few and far between. We would have been a bit more comfortable if we’d seen more pics.
When we were in China we asked for weekly updates via WeChat so we could really understand where the equipment was at. This gave us more comfort as the delivery date got closer.
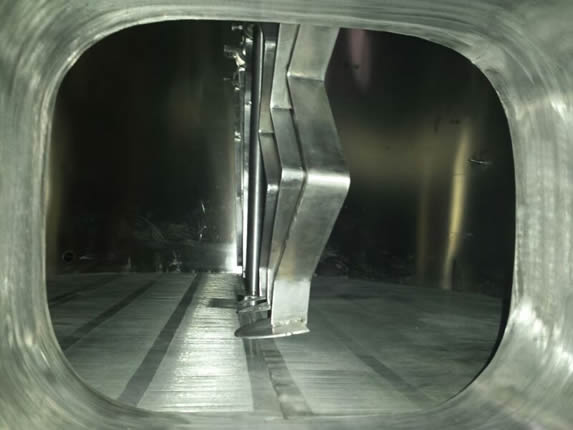
We also asked for more detailed pics of inside tanks and close ups of welds so we could be super sure on the quality of their work.
There are loads more pics in the zip file at the bottom of this post.
Freight Forwarder/Customs
The quote from the manufacturer included delivery to the port in Qingdau. It was then up to us to get the equipment from there to our brewery in Burleigh Heads on the Gold Coast. This was all very new to us so naturally we spoke to a number of people about this before deciding on someone to help us through the process. One of the pieces of advice we got was to not let the manufacturer handle this as you can end up paying twice for certain charges.
We got a bunch of quotes from freight forwarding companies,and ended up going with Laurie at CargoClear. CargoClear are based in Brisbane and were recommended by Wade from 4Hearts.
I’m pretty sure we still don’t really understand the range of quotes we were given, the taxes and charges that appear on them are mind boggling. The price difference between the various quotes on paper was up to $15k. In the end however the quotes seemed to balance out. The quote from CargoClear seemed a lot cheaper than other options at first but ended up being on par once all the charges came in.
One of the things that will potentially cost us money was a classification on the tariffs of what we were importing. The number one thing you need to know is, in Australia, brewing equipment is duty free. Your freight forwarder will not necessarily make this known as it is their job to ask questions not make suggestions. We had a bit of confusion around the classification involving PLC controllers and in turn did not import our gear as brewing equipment and ended up paying over $7,000 duty by mistake. We discovered this error the day before our equipment arrived and had the option to dispute, however, the potential to delay our delivery (at a cost of over $1,000 per day) could quite easily have totalled more than our refund. Luckily we were able to claim this after the containers had been delivered and were refunded in full.
Basically the job of the freight forwarder is to work with the manufacturer to coordinate getting the order onto the ship, through customs at the other end and delivered to our door. There are a number costs involved, we budgeted $16k based on some advice we were given very early on to allow for 4k per container, which was fairly accurate, however what was never mentioned were the taxes on top of that. It ended up costing 34k delivered to our door.
Site Preparation
With the containers now on the ship we knew delivery would be in roughly 20 days, which landed us at Christmas eve, we kind of hoped it might arrive just after Christmas. As luck would have it, it arrived bang on time 7am Christmas eve.
The week leading up to the delivery we were knocking down walls followed by flat out painting. The site we have (more on this in a future post), was 3 separate units which we converted into one single unit by knocking down 2 walls.
Here is a time lapse of us making an opening between what will be the tasting room and the brewery.
Here is a time lapse of us knocking down the main wall between units 2 and 3 to make one big space for the brewing equipment.
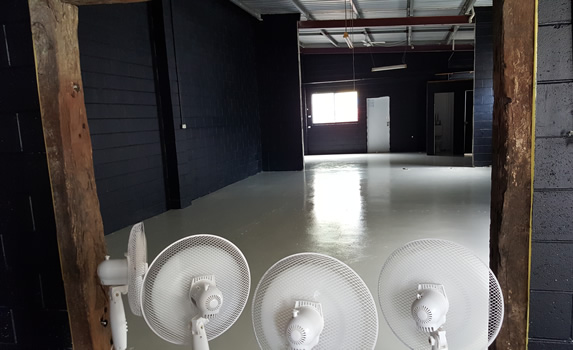
We painted the whole interior our dark (blackish) colour from our new branding and we also painted the floors.
The floor painting turned into a bit of a nightmare. It was Christmas eve (the day container 1 arrived) when we started prep work on the floors, acid wash, water wash, dry and prime. We were rushing and had issues with the primer going off, Dan spent an entire day literally waiting for primer to dry, setting up fans, leaving the roller doors open etc but it wasn’t setting. Christmas day came and we needed to paint in order to allow the paint to dry before we dragged tanks and forklifts across it.
Advice on the tin suggested keeping off it for 5 days, we kept off it for 5hrs. It didn’t last though, the paint was ripped up in no time which we’ll need to re-do in parts once the plumbing/drainage is complete. The paint we used was not cheap ($160 per tin) so this was sucky but we got the gear in and the sections around the tanks came off unscathed.
As for the electrical and plumbing preparations, we had planned to remove most of the existing hardware and replace it. We worked with our plumber and electrician to do what prep-work we could before the equipment arrived as most of the work would need to be done once it was all in place.
Containers Arrived
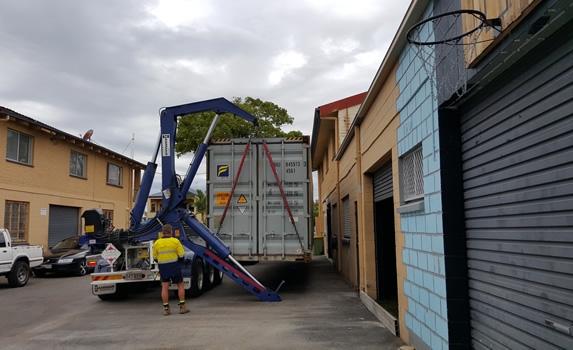
All the hard work of the last 9 months had finally paid off, and our equipment arrived at 7am on Christmas Eve in the form of one 40 foot shipping container (the others followed in the next few days). This was awesomely crazy.
As we mentioned above, the floor prep had started this same day, so we didn’t start unload the container until the Saturday. Still. Best Christmas present ever!
The deal with the containers and port storage is you get 10 days free at port. For first time importers you are almost guaranteed to be held and x-rayed at customs, which we were, so that eats into your 10 days. By time our 4 containers got through we had 5 days remaining before we had to start paying $250 per container per day and due to our site, we also had to stagger the delivery because we could only fit one at a time. We wanted to avoid any additional charges, so we had to learn how to unload a brewery fast and with minimal gear. This was the fun part.
Unloading
With the site prepped as best we could by this stage, the walls of the brewhouse were painted and the floor was painted, dry to walk on but probably not set set we cracked open container 1 on Saturday 27th December 2015 to assess what needed to be done.
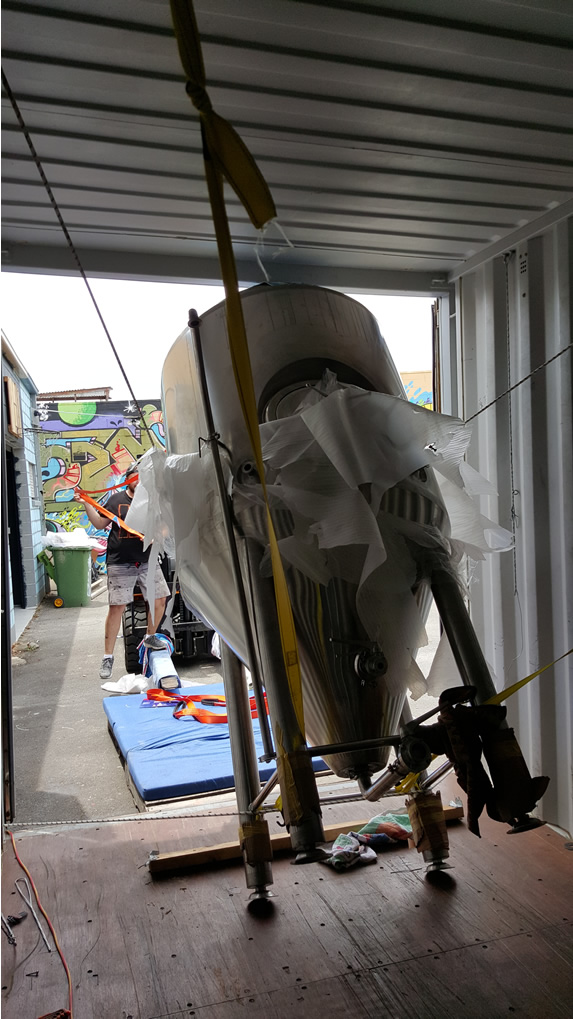
The plan was to use our forklift and some straps to get all of the equipment out of the container and into the brewery. There were a fair few unknowns:
- We were unsure whether we would need to remove parts of the roof for the bigger tanks.
- We weren’t sure if we would have to get in a crane, which we thought may be necessary for our biggest tank (4,000l)
- We thought there was a chance we’d need a second forklift.
- We thought there was a slim chance we just simply wouldn’t be able to do it and we’d have to get a company in to help us sort it out.
But we knew, we wanted to have a crack first, so we headed to Bunnings to buy the most badass straps and shackles and ratchets we could find, then got stuck in.
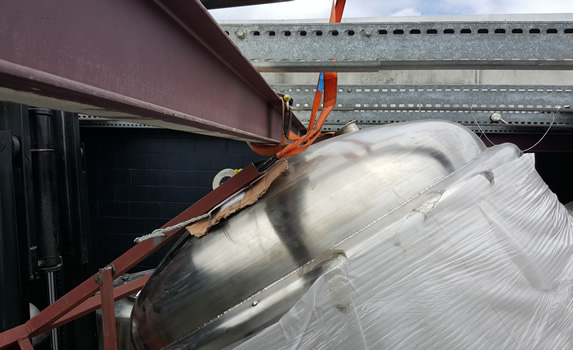
The first tank in the container was our 1,000L fermenter (our smallest tank). We attached the strap to it and our forklift and started to drag it out. We quickly realised that the tank was higher than the entry to the container. We still have no idea how they got this tank in there. They had it standing up but the height of the tank was taller than the opening of the container. We tried 3 or 4 different methods of getting it out, in the end we did some sort of combination of tilting it, pulling it from various directions with ropes, pulling it with the forklift and forcing it out. It took us 5hrs. The day was over we had 1 tank out.
Thankfully Sunday was better. We emptied the majority of the first container in one day and were getting the hang of it. We finished container 1 Monday morning and were ready for Container 2 to arrive Tuesday.
We are so very lucky to have such a supportive community of friends who offered their time to help us to unload the equipment. It was so awesome to have help from mates during this and could not have done it without them. A lot of free beer was earnt that day!
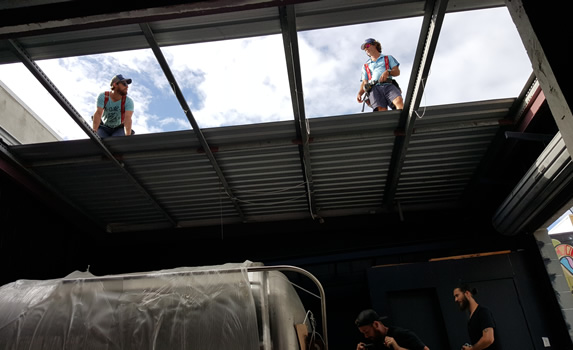
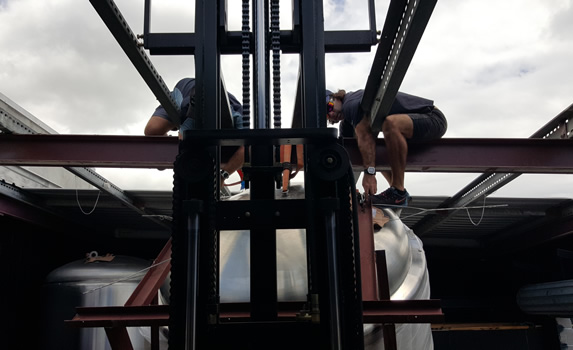
By the 4th container we were pretty fucking awesome at unloading tanks. Sideways, upright it didn’t really matter we had it sussed. The final tank we pulled out was our 40HL fermenter. We had this built a little shorter & a little stouter than usual to allow for our 4.1m high roof. This was kind of nerve racking as until it was standing upright we had no idea really if it was going to fit. We had our mates Byron & Dik plumbers/roofers come in and assist with the taking off of the roof.
The plan was to get the forklift mast up and above the ceiling height and lift it from above and slowly stand it up. The boys helped from the top.
She’s tight.
At this point we still didn’t know if it was going to fit.
Thankfully it did. Just!
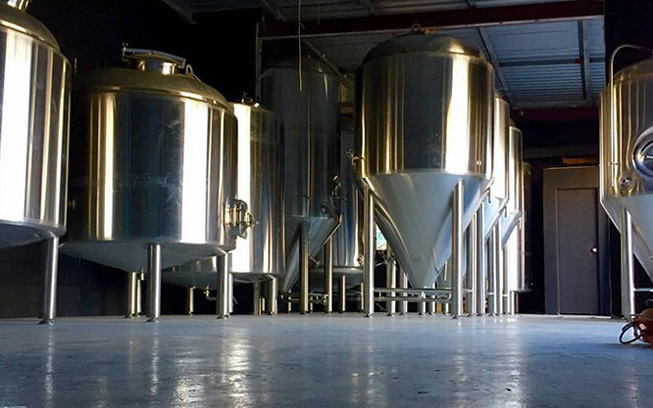
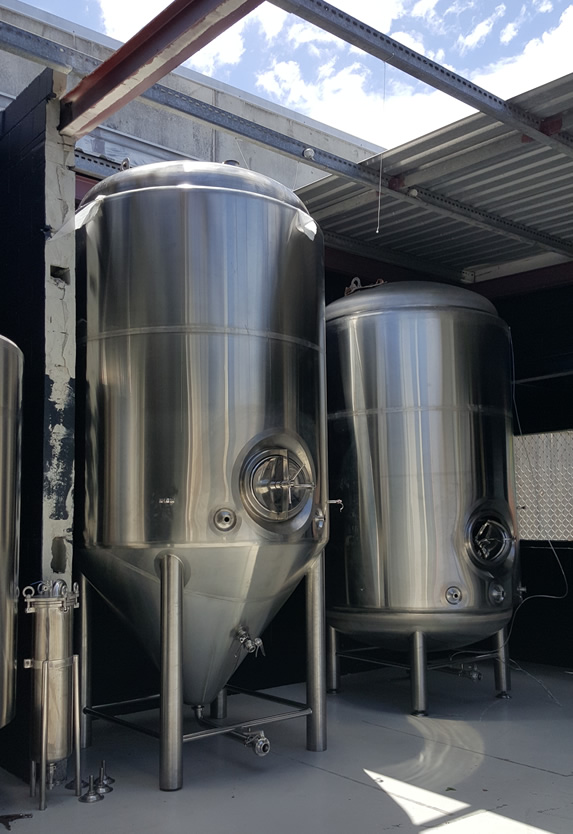
After a lot of moving tanks around and last minute layout changes, everything was in place.
Build quality and the piecing together
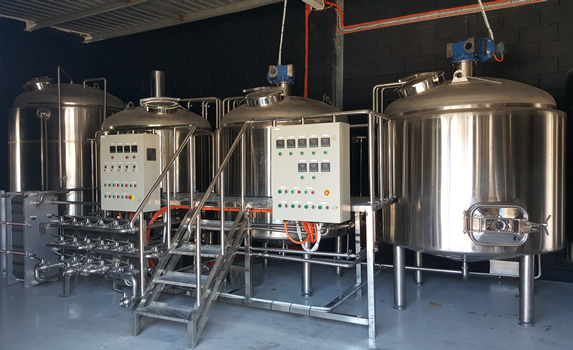
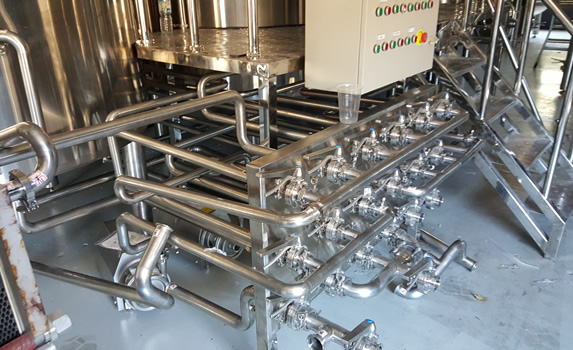
With all the brewing gear safely in Black Hops HQ, it was now Govs’ time to shine and like a kid with a new lego set, he got straight into piecing it all together. As we had chosen to remove a lot of the automated processes from our brewhouse, there was a lot of extra piping that needed to be put in the right places. After a solid two days of hard piping, it was starting to take shape.
It was at that point Govs noticed the sight-glasses were missing and a quick phone call to Tiantai revealed that they had stored them in the hard-pipes – which were now all assembled… oops.
It turns out they did label the pipes but I guess Govs’ mandarin isn’t so good. A few swear words and 2 hours later and the missing sight glasses were found.
Our first reactions were all very positive on the quality of the equipment. Everything was where it was supposed to be and the quality of the workmanship was above expectations. We will compile a full report and share it once we have put a few brews through the system on what works well, what needs improving and a general review.
Going into this process, dealing directly with Tiantai the manufacture in China, we had expected some things to not be quite as high quality as if we were to buy through an Australian or European supplier. We kept some surplus budget to tidy things up if need be but we really didn’t know what might go wrong and what we might have issues with.
So far we haven’t had major issues with any of the gear. It’s still too early to say because we haven’t brewed yet but a combination of us getting a mostly manual system and Govs’ detailed feedback on early suggestions, along with us physically inspecting the equipment seems to have resulted in a high quality system for a very affordable price. We will be putting out a podcast soon on our Operation Brewery show, on the specifics of our financial situation.
Where we are at
Everything is now in place, plumbed up and wired up. We have had the bright tank calibrated, excise licence granted (alcohol tax from tax office) and we are hoping to start water testing in March. We still have a few delays with approvals unfortunately but with a bit of luck we’ll be ready to go soon.
We have had many visitors from locals, friends, family, homebrewers and other craft brewers over the past two months eager to lend a hand and it has often been at a time where having a fresh eye on a challenge is exactly what we needed.
As for after-sales support from Tiantai, it has been very good. We haven’t had to contact them many times but when we have, our questions have been answered usually within 24-48hrs. Only once did we need an urgent response when one of the parts that is used to weld the PPR glycol pipes together was supplied in the incorrect size and once raised, a replacement part was shipped express to our factory that day from China and arrived 3 days later.
Since placing our order, we have received emails from upcoming breweries all over the world looking for equipment suppliers and it has been a great pleasure for us to share our journey.
If you want an introduction to the guys at Tiantai, just flick us an email beer@blackhops.com.au and we can do that.
Here is a folder with shitloads of images from the whole process. Leave a comment below if you have any questions.
Cheers!
