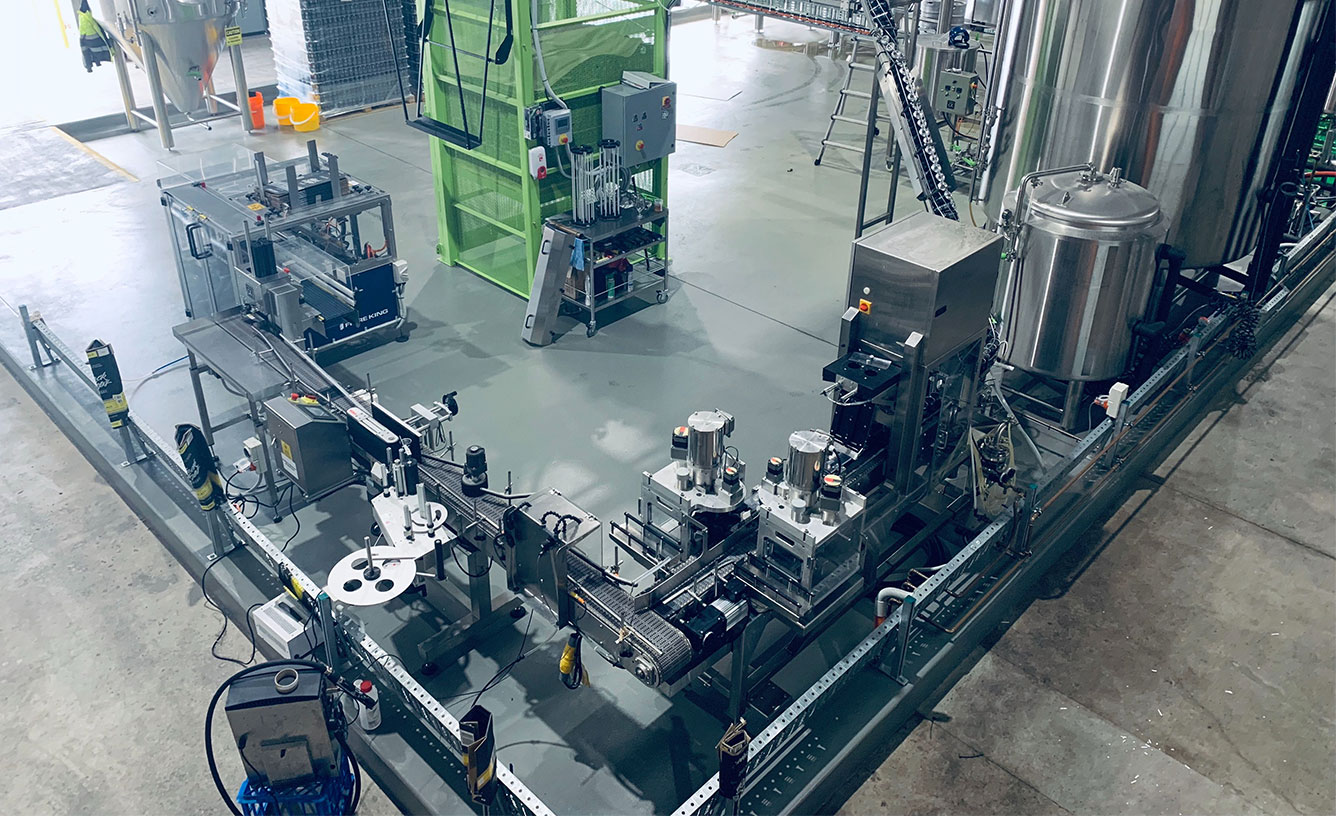
Canning and packaging are two of the most important aspects of our beer production process here at Black Hops. Our two breweries operate under different set-ups, with Burleigh HQ running both automated and manual set ups in tandem, while BHII in Biggera Waters runs with a more automated set-up.
In this post we cover what we use for our canning and packaging solutions and how they operate across both our sites..
Canning at Burleigh HQ: CraftCan 15 System
Our original HQ brewery, as well as operating at a much smaller scale of production, was set up on the fly, at a time that we were sending all of our beer out in bottles. When we started out, we bought a small manual 4 head bottling machine which enabled us to bottle beer on a very small scale. It was cheap and meant we could sell bottles at the Taproom, but it was very inefficient and very labour intensive. The plan was always to try to package on a bigger scale and cans were on our radar from day 1.
When we made the switch to cans, we initially used a mobile canning operator, Craft Punks Canning. They were great for us at the time as it enabled us to get into outlets without the large financial outlay for a canning line. The plan was always to get our own once finances allowed so we worked towards buying our own and ended up going with CraftCan 15 System, which we purchased from American Beer Equipment.
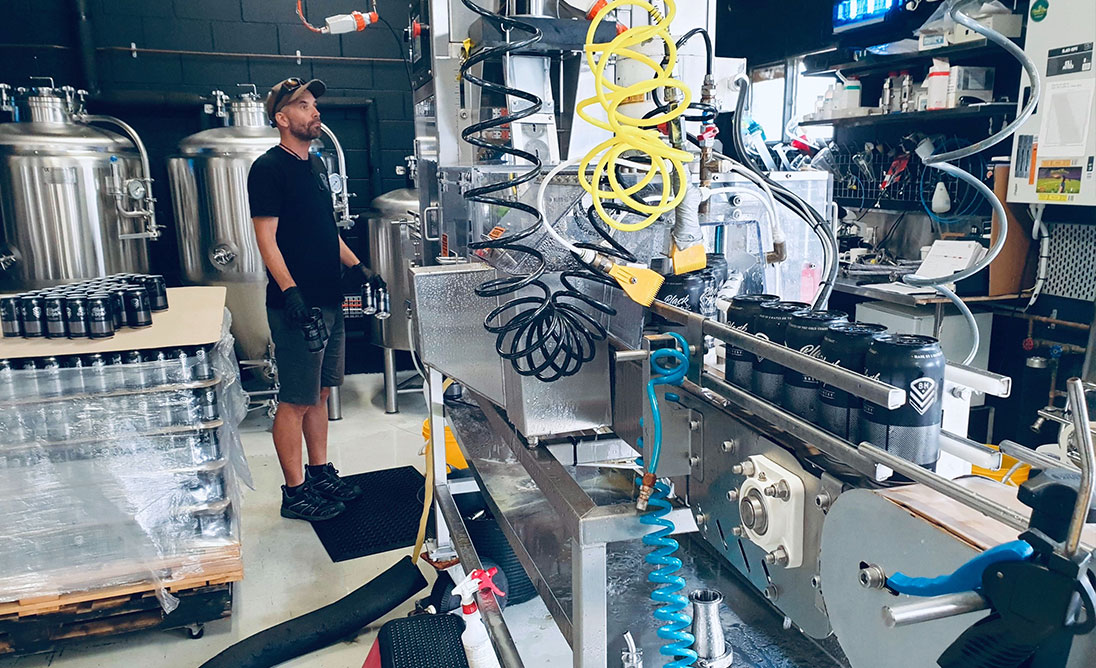
Our CraftCan15 setup is one of their earlier models so it doesn’t have all of the features on their website, however it shares the same super small footprint (great for a small craft brewery) and while its design is quite simple, it features plenty of essential components such as smart filling tubes and plenty of co2 purging lines to keep oxygen out. We’ll go in-depth into why oxygen and beer aren’t compatible in a future upcoming post.
We added a few modifications to ours, including:
- additional safety glass with cut out switches on the doors to prevent operators from getting their fingers into pinch points. It’s often human instinct to grab a can that is about to get crushed so we wanted to eliminate that risk.
- some serious off-road wheels to the line to make it mobile. Our brewery layout is constantly evolving and we are limited with space, so having the ability to be able to move the packaging line around and in and out gives us more options with our space.
We also purchased an inline labeller and a pack-off accumulation conveyor/table to inspect, weigh and pack the cans into 4 packs and cardboard cartons.
After 12 months of operating the machine, we’ve also made some further custom adjustments to suit our needs. One of the major tweaks has been an improvised lid bar that keeps gentle pressure on top of the beer lid after it is applied but before it is seamed. This helps to keep the lid on top of the can as we are trying to create a healthy foam cap on top of the beer before seaming, to reduce dreaded oxygen pick-up as the lid can potentially get lifted too high and thus not be positioned correctly going in to the seamer.
We also added a date code printer prior to the filler entrance, which prints a batch-code/bb/pkg date on our cans to make sure we’re legally compliant and to let our customers check that our beer is still fresh.
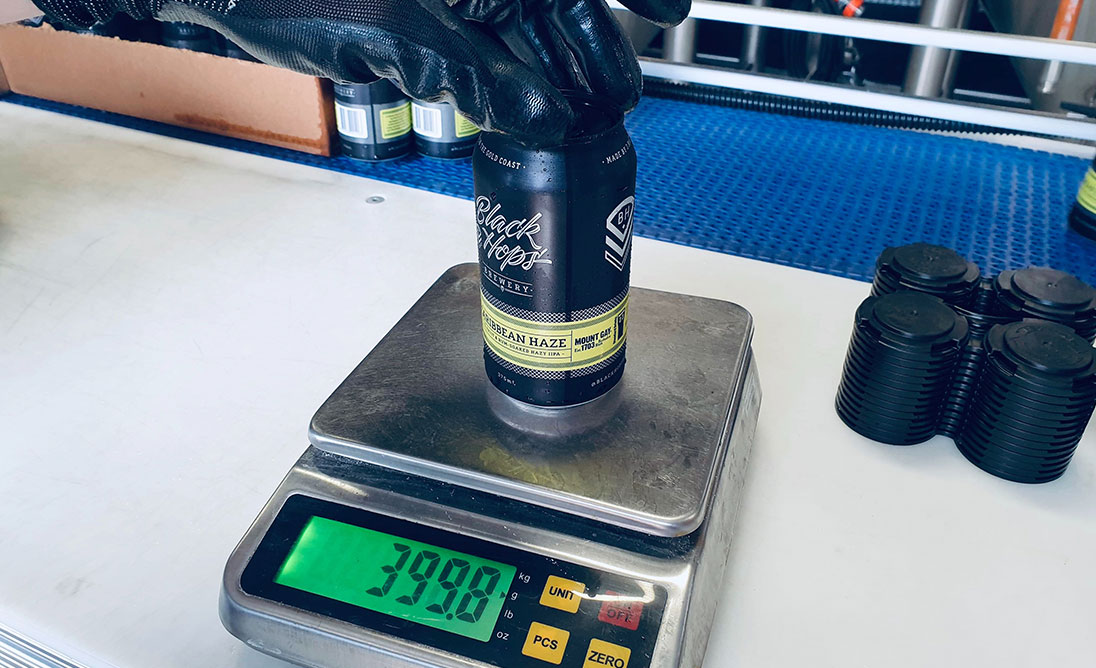
Our model did not come with an inline weigh station or rinser/dryer, so we’ve retrofitted those via a set of scales on the pack-off bench and some plumbing parts with air and water lines hooked up after the seamer.
Our seamer motor is a lot bigger and louder than the newer models however it is super simple to maintain and our local motor tech keeps a close eye on the seals and bearings.
The seamer tooling is not the greatest I’ve ever seen (but also far from the worst) and it operates on an air pressure driven shaft not a servo, which requires us to keep a very close eye on its alignment and takes longer to adjust.
However, like all good machinery, if you look after it, it will do a great job. Another plus of our setup is that breakdowns can actually be a lot easier to fix due to the simple nature of the design.
We can operate this entire canning/packaging line set up (which includes hand feeding cans on, printing, filling, seaming, rinsing, drying, labelling, 4pack/24pack packing and gluing) with a team of 4. Once we fully understood how the machine performed with our beer at certain temperatures and pressures, we’ve been able to achieve speeds of between 20-25cpm.
Another important feature of our packaging set up is that we can set up the line to be less than 2 metres from the Bright Tank, which means we minimise any potential temperature gain. The reason this is important is that any temperature gain inline between the filler and the bright tank makes it much more difficult to fill the cans, as the co2 in suspension breaks out more readily at higher temperatures. So keeping the temperature lower means less break-out and faster and more consistent fill speeds. We don’t want it to get too cold though, or we begin to lose that essential foam cap, which has the potential to play havoc with beer quality.
Packaging at Burleigh HQ
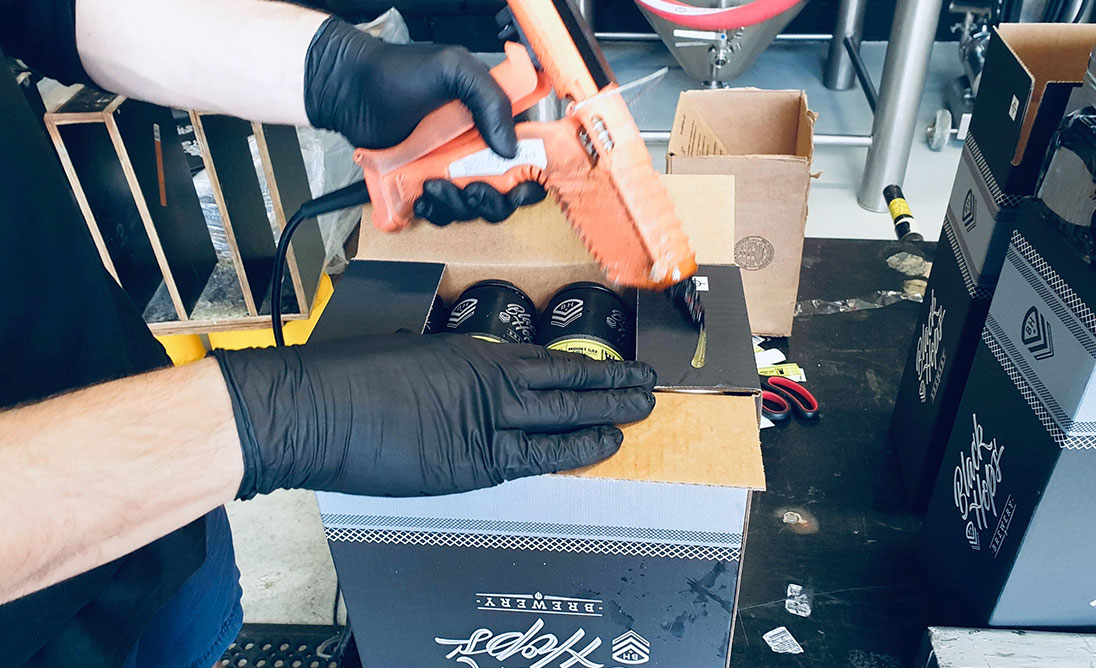
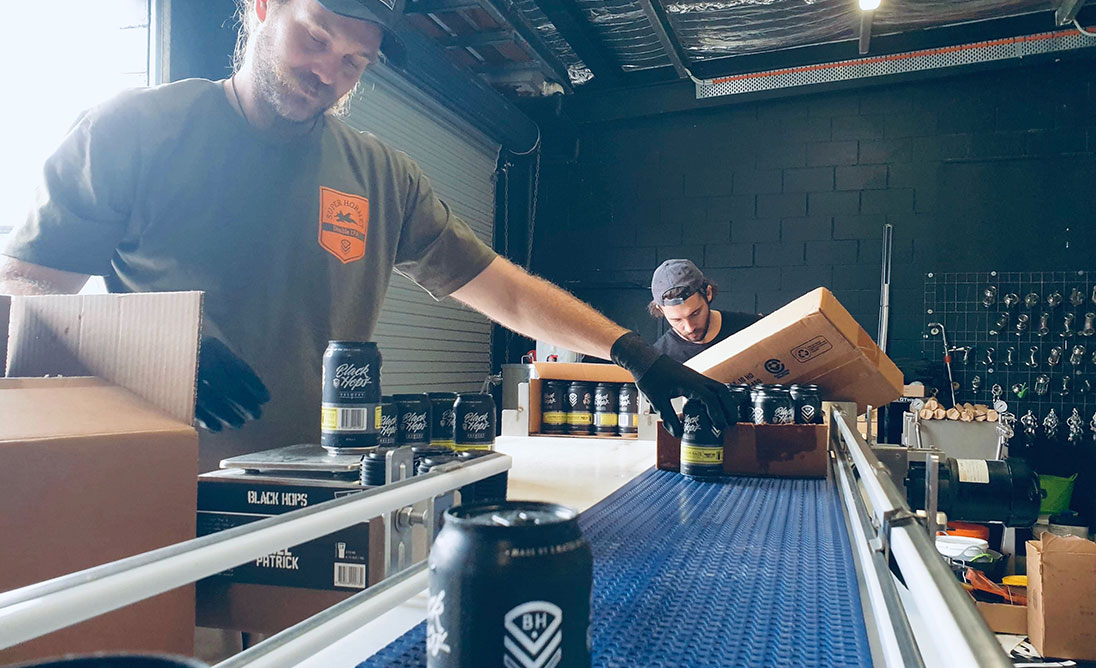
The packaging process at our Burleigh brewery has always been very labour intensive. A canning/packaging line team at HQ consists of 1 operator and 3 casual workers, whose role within the packaging process at HQ is to make up and glue the boxes/cartons, fill them with cans and glue them shut, ready for storage and delivery. As well as looking after all the gluing and filling, it’s also the responsibility of this crew to make sure consumable stocks (cans, lids, labels, 4 packs, boxes, glue) don’t run out. Having two breweries can, however, present its challenges with making sure that all the packaging elements are onsite at both locations.
Making sure the labels get applied to our cans in a consistently correct manner is an important part of our brand compliance and is something for which the packaging line operator is also primarily responsible for. The staff that we employ undergo a strict recruitment process to ensure they have the skills necessary to perform their duties. Although it can seem like a mundane and repetitive job, our entire team takes a lot of pride in the quality of our product. Craft beer is particularly fragile when it comes to handling, so it’s vital that we adhere to a tight and measurable packaging process.
Our packaging team do a great job in keeping labelling mistakes at a minimum. We keep on top of it though, and are always working on ways we can improve how our packaging team performs and how to prevent fatigue-related errors. We also keep detailed records of our labelling losses and hold regular meetings to discuss potential improvements.
Generally speaking our manual packaging process serves us well, and with the smaller scale of production at Burleigh HQ, there is not really a cost effective strategy to automate our packaging processes at this brewery.
Canning at BH II: It’s A Beer Cannon Invasion!
Meanwhile at our new Biggera Waters brewery, we needed a different canning and packaging setup, on account of all the extra beer that’s brewed there. This time we went with Alpha who supplied our Brewery equipment at BHII. In the packaging area they supplied us with a bigger and faster 8-head inline canning machine which, once operating perfectly will hopefully enable us to empty a tank in one long day of canning, which is around 1,600 cartons.
When we approached Alpha we gave them a brief of what we were looking for from their package:
- to empty our 150HL bright tank in a day – in an 8 hour shift that would amount to between 3 and 4 cases per minute, or 72-96cpm.
- to meet proven industry performance standards – although it is often the Black Hops way to be pioneers, for this project we wanted lots of references to ensure our production needs could be met.
- A package to fit our budget – we needed to be pragmatic, which meant balancing required vs desired features to get the best set up possible without blowing the budget. A huge rotary canning machine wasn’t on the budget this time around.
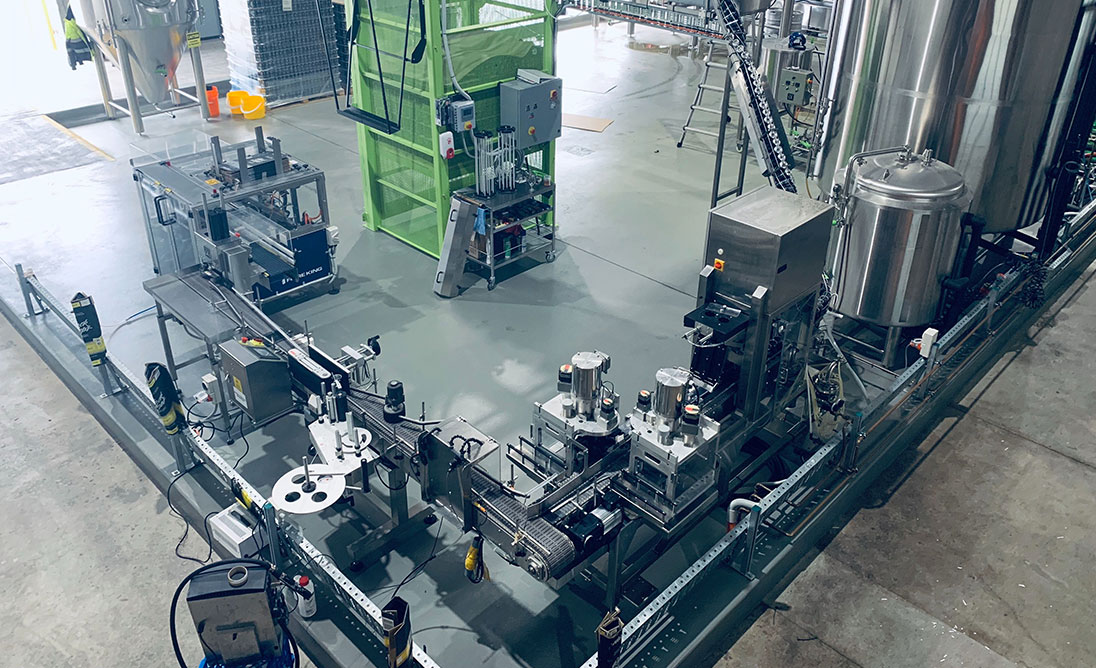
Based on these guidelines, they offered us their 8 head in-line ‘Beer Cannon Invasion’ package (which we could have nearly ordered based on the name alone!) They told us it was capable of 72cpm – from my experience with packing lines, manufacturers often underestimate the speed so they don’t disappoint anyone who may have trouble meeting their optimum beer specs (eg. temp, carb, distance from line).
So I was pretty confident we were onto a winner – and even more so after speaking with some of their customers, which gave me confidence that we should be able to get it running a bit faster after we had some time operating it. This package was about as serious as you could go with an inline set up. The other option, with the budget we had, was to go for a bottom of the range rotary filler. But we decided against this.
How the ‘Beer Cannon Invasion’ system works
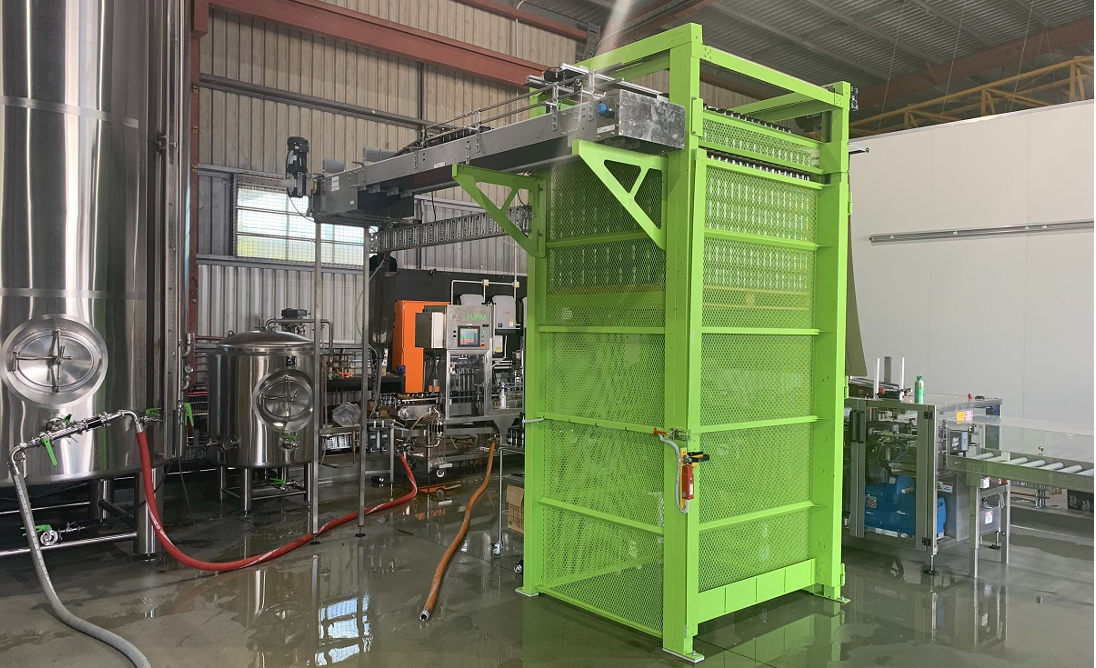
So let’s break down how this bad boy operates. The 8 head inline canning machine starts with a depalitiser to unload the cans from pallets and feed them into the filler via a twist rinser.
Depalitisers are complicated beasts on their own – if you can imagine loading a pallet of cans into a cage that raises up and sweeps off a layer of cans and then removes the divider sheet between the next before repeating the task, you can start to picture that there’s a lot that can go wrong here!
So getting the correct alignment and setting the unit up properly is critical, or else the ramifications can be ugly – seeing the sweep bar crush and mangle an entire layer of cans before your eyes is not a pretty sight!
There are a lot of sensors that feed information back to the controller that tell the unit when to raise and when to stop, and when to sweep and when to retract. We spent a lot of time in the set up phase making sure we programmed this correctly. The operator also needs to keep their wits about them. For example, in the case of any damaged cans or warped pallets, unless the operator pauses the packaging process to fix things, their day is going to get worse before it gets better.
After some minor headaches in getting this part of the process working correctly and understanding the machinery, we have yet to have a show-stopping issue. In fact, our only real issue has been due to our inexperience in running a depal. The angle at which we chose to feed off the depal and into our twist rinser was not exactly what Alpha recommended.
So instead of feeding straight inline, we chose to come off at a 45 degree angle, as this reduces the footprint of our packaging line and frees up more brewhouse floor space. One small issue we encountered by doing this was that cans would occasionally getting jammed at the infeed. So to combat this we added an electronic vibrator, which are very common on packing lines and conveyors and help to keep the cans loose and flowing.
Rinsing the cans
The next step involves feeding the cans off the conveyor on top of the depal and into the twist rinser, which is a can shaped cage that turns the can upside down as it travels down via gravity into the can filler. During this process it is rinsed with sterile, filtered water and then turned back up the correct way.
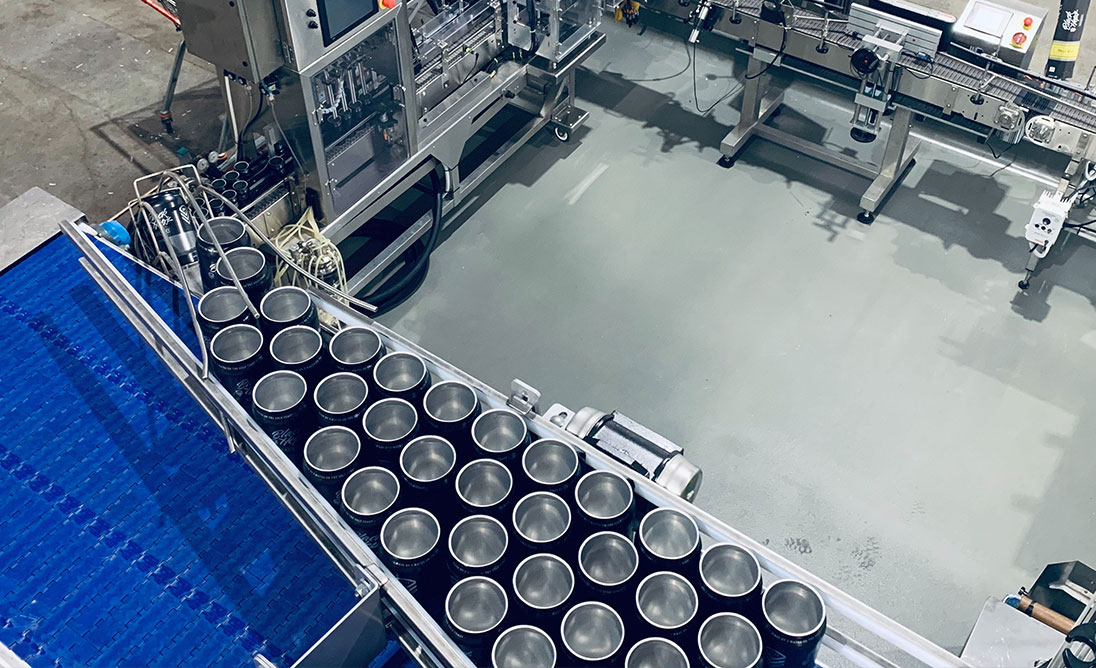
When it comes to rinsing the cans it’s a case of ‘each brewer to their own’.. anything from a mild sanitiser, to water, or even as hardcore as deionised air, are all valid options.
This is done to remove any debris that might have fallen into the can between the time of unloading the pallet into the depal and prior to entering the filler. The cans should already be produced to Australian food and hygiene standards – if your cans have dirt or organisms in them before this step, you should be addressing that before you think about using them!
Filler Up!
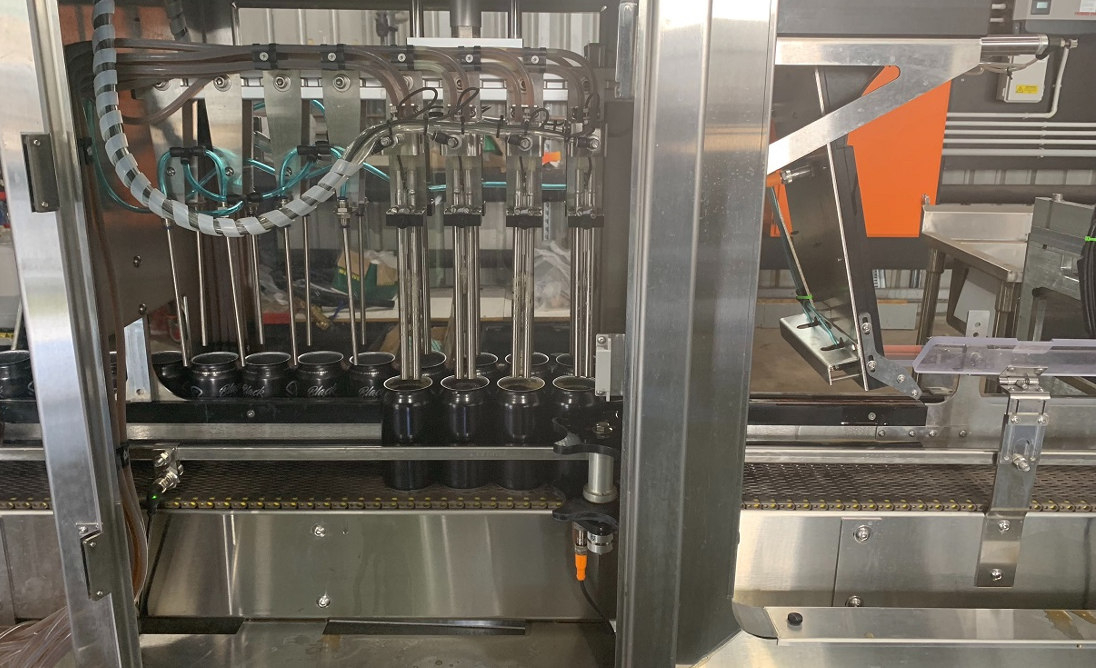
Then it’s time for the cans to go into the filler. As they come out of the twist rinser, the cans are diverted into 2 lanes each containing 4 pre-purging heads and 4 purge/filler heads. The first heads are just co2 lines that displace air in the can (you set a time to regulate this). While the second set of heads have a filler head and an additional co2 line for continued purging while they are filling with beer. The filler heads have sensors that tell the unit when the can is full of liquid.
From there you can increase or decrease that level based on your weights. Increasing your levels due to underfilling is something to look out for. This can typically occur when the filler sensor comes into contact with foam rather than liquid, due to the beer being in a cold, carbonated state. You can also adjust the heads to do some of the filling process whilst raising the heads to decrease the fill time. Then there is a final co2 blanket applied to the top of the cans while they travel out of the filler cabinet.
Lids and Seaming
Immediately after filling, the cans go through a dual lane lid picker to have their lids applied. The advantage of running this as a two lane set up (compared to something like an 8 head single line filler) is that it decreases the time it takes for the last can in the line to have a lid applied, therefore reducing exposure to oxygen – which is something to avoid, or at least limit the effects of as much as possible. We’ll go into this issue (known as oxidisation), in our follow up article ‘things that can go wrong with canning and packaging’.
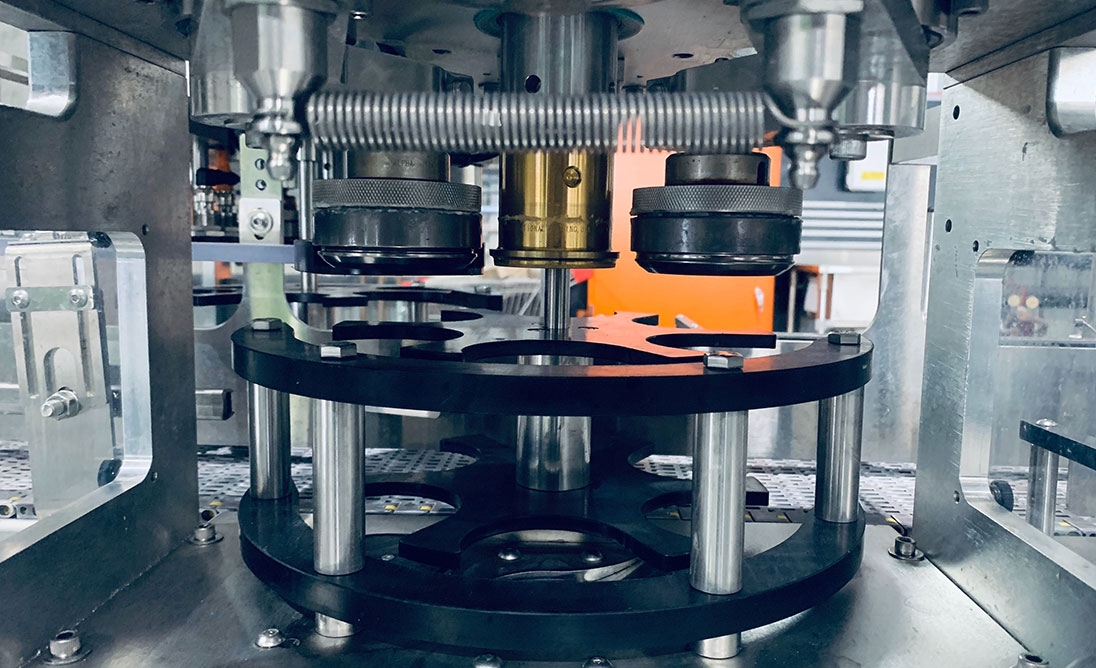
A lid is dispensed and applied to each can all under a blanket of more co2 before going through a lid bar station and then into our dual cam, servo-motor driven seamer heads. This component is of the most highly impressive features of Alpha’s packaging solution, as it allows us to control the 1st and 2nd operation to within a thousandth of an inch at the push of a button! Visit seamschool if you would like to know more about the fine art of can seaming.
The indexer wheel that aligns each can to the seamer heads is also cam-driven and super easy to adjust. The tooling is of exceptional quality for an inline system and there is also a neat little weigh cell inside the seamer station that checks the weight of each can before seaming. Any low fills are then automatically rejected, along with any cans that made it through without a lid, via a driven arm. It’s important to have such checks and balances in place to ensure that substandard product is not hitting the shelves.
Additional features and benefits
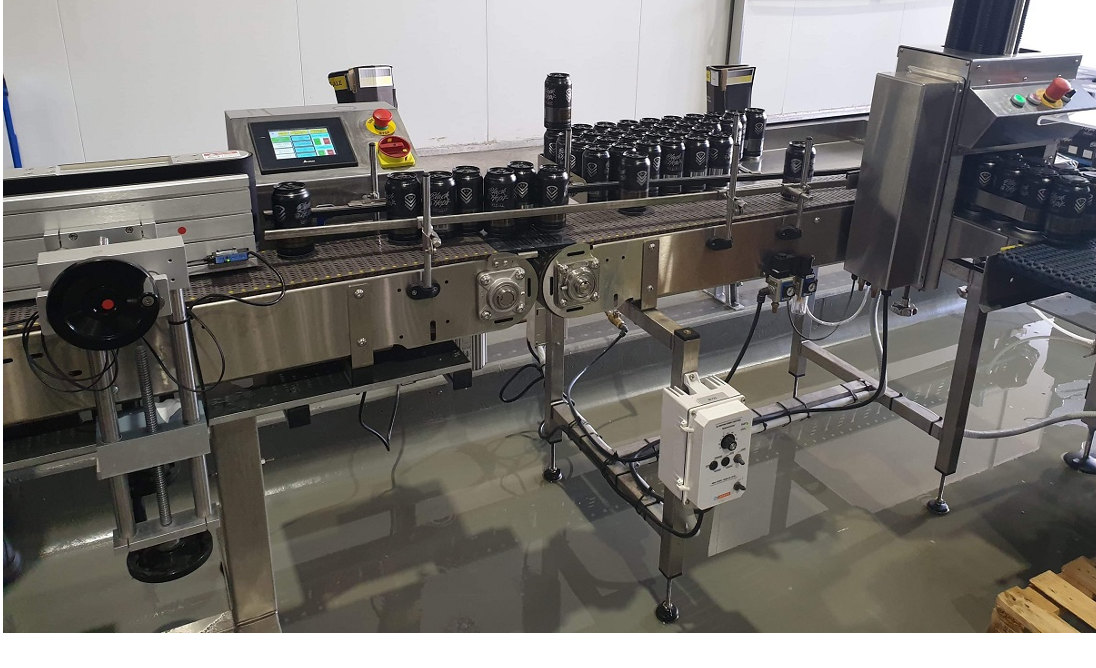
The Invasion package also comes with some extra bells and whistles, which are actually vital for the scale at which we are now brewing:
- a sensor-activated rinser and dryer
- a date code jet printer
- an inline labeller
- a mini-gun pak-tec 4/6 pack applicator
BH II packaging solution: automated case erector/packer/sealer
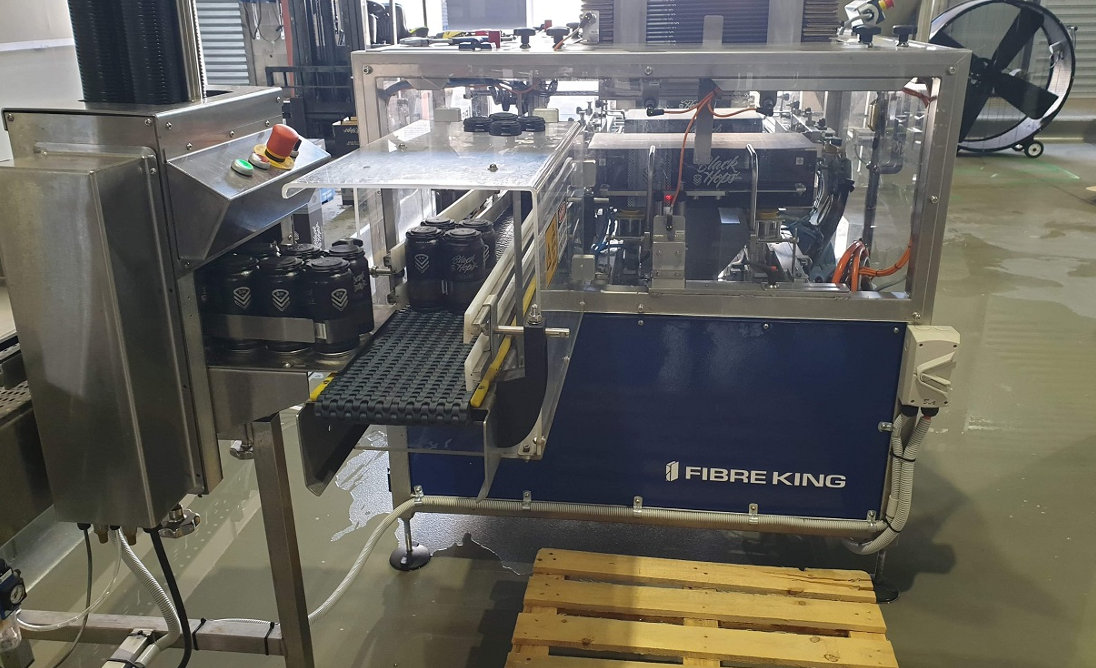
When we were setting up BHII, a big criteria was to take things up a notch and improve upon our original set up at Burleigh HQ. Part of this fell into the category of ‘lessons learnt’, but a big part of it was also because the new brewery was a lot bigger in every aspect, and serves as our number one full scale production brewery.
So instead of duplicating our labour-intensive, manual packaging process of HQ, we went with an automated packaging set up, a Case Packer, from Fibre King in Brisbane. This nifty piece of equipment lets us automatically package our cans directly off the canning line and straight into our cartons/boxes.
You might be interested to know that we got Fibre King to custom-design this set up for us. They have been leaders of the automated packaging solutions market for almost 100 years and normally supply automated equipment to much larger scale operations. But we were lucky enough to have them create us a solution tailored to the craft beer industry in terms of size and affordability.
This prototype set-up is a world first and lets us automatically pack our 4 packs into 16 or 24 pack boxes without full time human support. Without this machine, we would be forced to erect, pack and glue every 4 pack into cases by hand requiring a lot of labour and often excess preparation before canning day.
This ‘Little Packer’ (designed and built right here in Queensland) and after serious testing phase, was delivered to us just in time for our first canning run.
The ‘Little Packer’ operates as a fully automated case erector/packer/sealer and sits at the back end of our canning line. It’s been a very welcomed addition to our set up, with the resources it frees up allowing us to hire for other necessary positions within the company.
So far we’ve only completed a hand full of packaging runs on this line, so it’s still a bit too early to pass too much judgement. But we can say with confidence, that we are extremely satisfied with everything so far. We are hitting all of our critical numbers and our team is still very much in a learning phase with a lot of the specific equipment. So far, so good!
Part two, coming soon..
Things have generally run smoothly with our canning and packaging set ups, but there’s always unexpected surprises. And you need to make sure that perennial brewer headache material such as oxidation and low fills don’t rear their ugly heads. We’ll go into these topics in part 2 of our canning and packaging expose, so stay tuned for that one.
If you like the content we put out, please jump on our email list here, where we send out a monthly update with everything that’s happening at Black Hops. We also have the Black Hops Ambassador Facebook group, check that out here.
Cheers.
Michael McGovern – Co-founder and Brewmaster at Black Hops.
