With the beer festival season approaching, we were in need of a way to get Black Hops out into the wild on a budget. We had a few options:
- Buy a portable bar ($2,000+ but you’d always need access to power and they are heavy, bulky and difficult to move around).
- Pay someone to build us one ($2,500 was our best quote).
- Borrow/rent one as required (about $50ea a day with a lot of organising each time).
- Make our own (a lot more fun).
We opted for option 4. We wanted something we could fit in Kevin (The Black Hops delivery vehicle), something fully portable, good looking and we wanted to save some cash. It also helped that we had some mates who would do anything for beer, so we asked for their help.
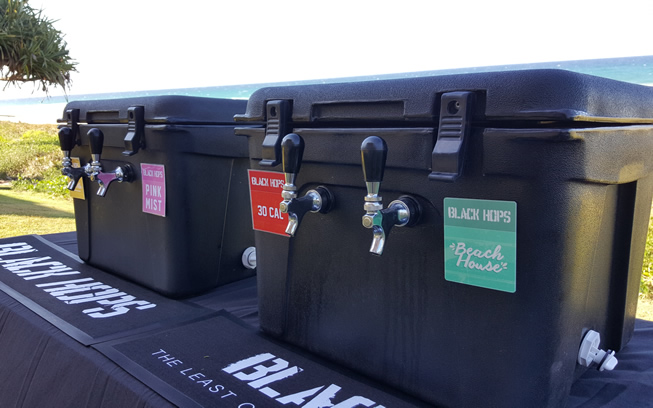
In this post we’ll show you how we went from idea, to fully functioning jockey box (shown above) for under $1,000.
What is a jockey box (or miracle box)
To serve draft beer you need a few things.
- Beer (in kegs).
- CO2 gas to push the beer through the lines.
- Something to make the beer cold.
Bars have complex systems for managing this (Glycol chillers) but for portability, the Jockey Box offers a nice, simple solution.
Here’s how it works.
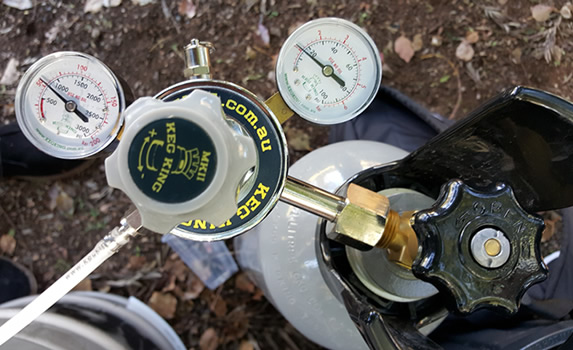
A standard CO2 gas bottle supplies the gas.
The gas flows to a Gas Line Manifold Splitter controlling the flow of gas to the kegs.
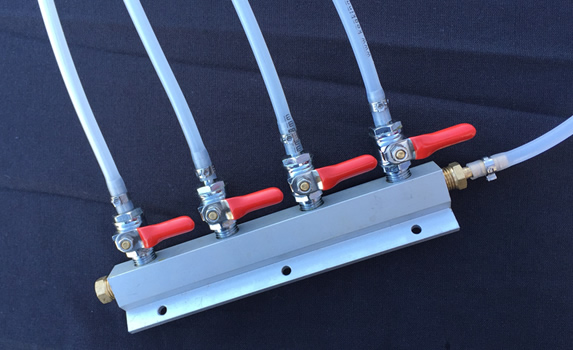
The manifold includes 4 gas line outputs with 1⁄4inch ball vales. This enables you to turn gas on and off for each keg as well as prevent gas or beer migrating from one keg to another.
It means you can use 1-4 kegs easily without having to change the setup and manifolds can even be joined together to increase the output later on.
The CO2 goes from there to the Keg Coupler to suit your keg type.
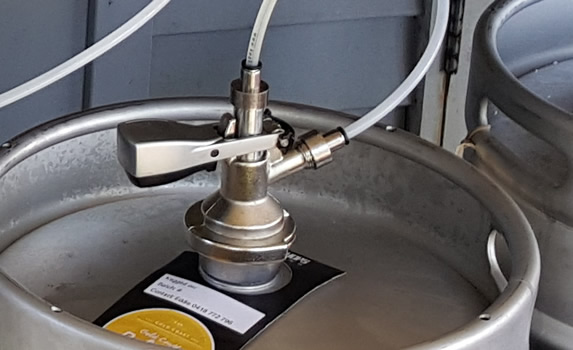
The beer flows through the lines to a Cast Aluminium Chiller Plate in an Esky box.
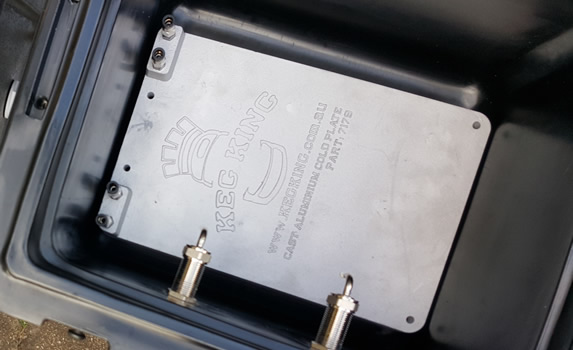
The plate chiller consists of 2 x 5.5m stainless steel beer lines inside cast aluminium thermal block which acts as a very effective heat sink, cooling the beer as it passes through the jockey box. Warm beer in (although ideally the kegs come from the fridge), and cold beer out.
That may sound simple but cooling beer is no mean feat. The laws of thermodynamics come into play; namely pressure, thermal conduction and convection. Chiller plates aren’t the only way to do it but this system gives greater surface contact with the surrounding ice slurry for more effective cooling in a smaller esky.
It’s then ready to pour.
How do you build it?
The first step was to order the bits & pieces. We used Keg King, they have great prices and service as well as quick and accurate delivery.
Shopping list
- Keg Coupler x 4
- Brumby Style Draft Tap Long Shank (100mm) x 4
- Cast Aluminium Chiller Plate x 2
- CO2 Gas cylinder 6kg
- MKII Multi Regulator CO2
- Push in 8mm fittings x 24
- Gas Line Splitters x 2
- One way check valve (8mm push in) x 2
- Faucet/Tap brush x 4
- Stepless Line Clamps x 20
- Ball Lock Disconnect (Black & Grey) x 4each
- Gas Ball Lock Post ⅝”
- Liquid Ball Lock Post ⅝”
- 20m of 5mm Beer/Gas Line
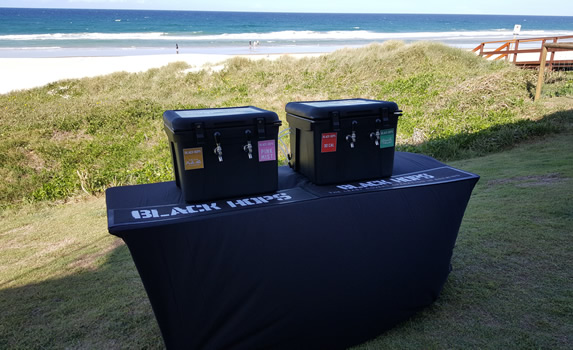
We also had to source our own esky. In the end we decided to go with 2 x smaller eskies with 2 taps in each, rather than one big one with 4 taps. The idea was if we ever had a need to only use 2 taps, we had that option, they are much lighter & less bulky as well.
We wanted black eskies, but a quick search proved black eskies aren’t as common as a white or a blue one, then bingo, an ebay search we found this listing (may not work depending on when you read this).
Cheap (check), Black (check), Boom!
They arrived and were pretty much perfect (more on the pretty much later).
So now we had all the pieces, we just needed to put it together.
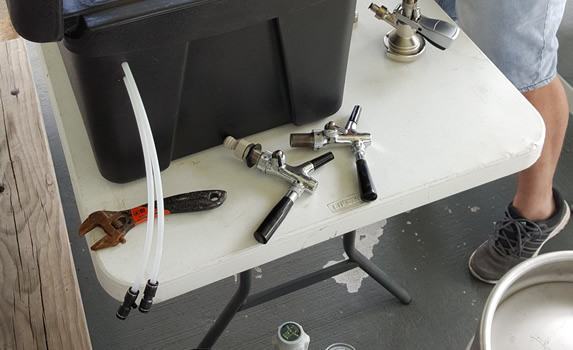
Tools
- Drill
- Drill bits
- Multi Grips
- Stanley knife
- Silicone
- Jon

This is Jon from Kruges Plumbing. He’s a mate of Eddie’s, a plumber and a roofer, qualified gas fitter and fuck knows what else but he knows everything about everything and he gets shit done. The best part is he likes beer so in short, he’s a very good guy to know if you are starting a brewery.
Assembly
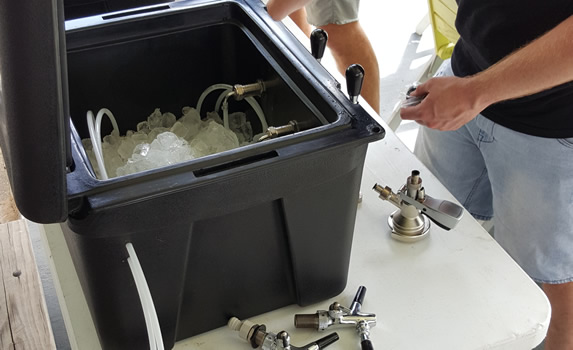
Step 1 – Drill the holes to fit the taps.
We drilled a 21mm hole for each tap and pushed the taps through.
Step 2 – Drill holes and push beer lines through
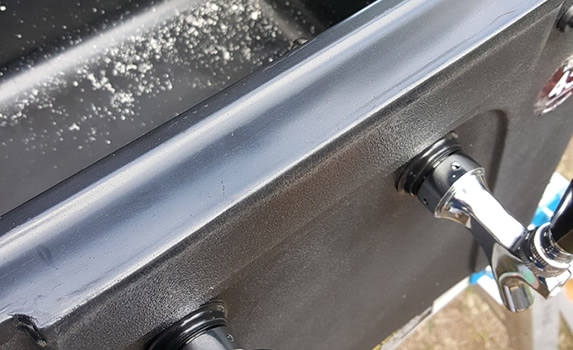
Next we drilled holes for the beer lines and pushed them through.
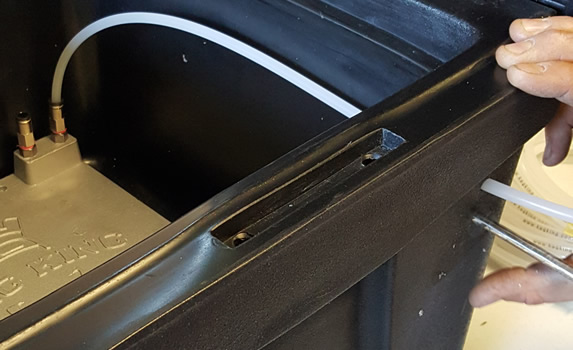
To avoid water/moisture getting into the foam of the esky, we left about 10cm of line sticking out externally & siliconed that off so it was all sealed. We then used John Guest Push-in Fittings with the line so we can easily hook up & unpack the beer lines from outside the box.
Step 3: Drop in Chiller Plate and connect lines
The next step is to drop the chiller plate into the esky and connect the lines. During the build, any tie we connect lines we used stainless Stepless Line Clamps to ensure the lines don’t get knocked off.
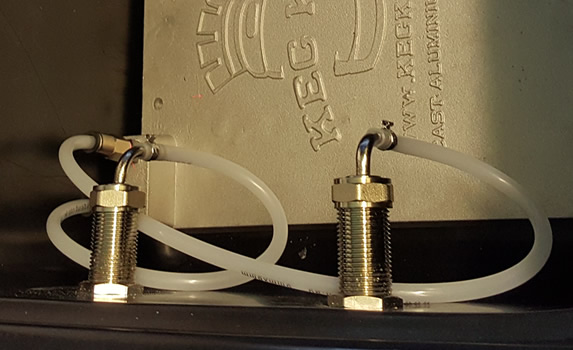
Remember before when we said the eskies were almost perfect? Well one slight problem was they didn’t sit flat on the base in one of the eskies. It was always going to be tight knowing the dimensions of the box.
We overcame this by applying a heat gun to the inside wall of the Esky, putting in a bit of cardboard to stop scratching & pushing the plate in flat. That was enough to reset the mould enough to enable us to get the plate in and out.
Step 4: Hook up gas and beer via regulator & coupler
The next step is to hook up the gas. We installed back flow prevention valves on the gas line to protect the regulator from back pressure and stop beer from getting into gas line.
We also used John Guest style fittings to allow us to easily swap couplers and keg types. Make sure you have enough line to comfortably set up your keg station and then be careful not to over gas the keg. Only use enough pressure to maintain a good pouring flow rate.
Also remember to disconnect couplers and close the gas bottle when not in use to prevent leaks.

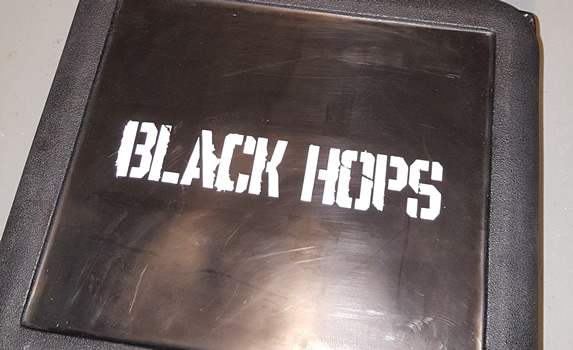
Step 5: Slap on a sticker
We need to make this look like a full custom setup, so vinyl stencil stickers are required. We picked these up from Graffiti Stickers in Burleigh. $11 each, but they gave us 5 for the price of 3!
Step 6 – Pack it with ice & water & test it out!
All that’s left is to add ice and give it a test.
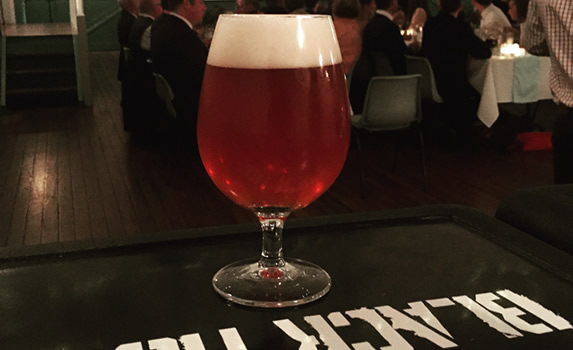
Fill the jockey box with ice and water to form a slurry and make sure the plate chiller is fully submerged. Pour the beer through and enjoy!
If the keg is pre-chilled it’s less work for the system to cool the beer but it will work either way.
We were also lucky enough to give the system a full workout at our mates wedding on the weekend.
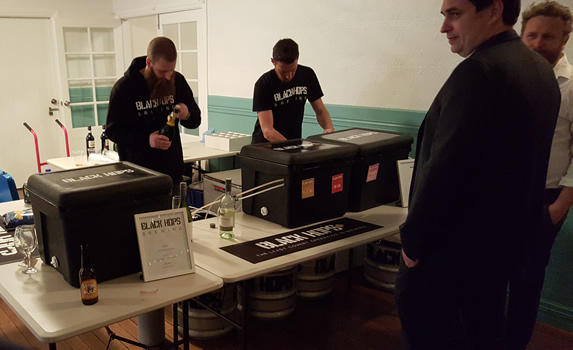
We had 4 kegs on, Gold Coast Pale, 30 Cal and Pink Mist (see our core range here). It was pouring amazing and was a huge hit with the wedding guests.
If you have any questions about the Jockey Box setup, let us know in the comments.